Manual imposition is the most flexible part of Quite Imposing. It allows you to overlay any page on any other page. To avoid confusion, the target of the imposition is called a sheet, rather than a page.
Manual imposition is, however, much more cumbersome to use than other functions like n-Up Pages , Step And Repeat , or Create booklet . Many tasks can be done with n-Up Pages in conjunction with Shuffle Pages For Imposing , so investigate this first.
With manual imposing you will use a three stage process, which is covered in more detail on subsequent pages.
1. Select a target. This is the
document which will have pages added to it. Usually, you'll want to create a
blank sheet as the target. The target is a specific sheet in this document, and
it is easy to move to the next sheet (creating it if necessary). The target can
also be set using a background PDF file. New pages will be created with copies
of each background page in turn (see Create booklet ).
2. Select a source. This is
where the pages will be read; the source will not be modified. The source is a
specific page in a document; after you add this page, the page number
automatically increases. You can change source at any time to impose from mixed
documents.
3. Select imposition options and
click Add Page .
The options define where on the sheet the page will be placed, scaling and
rotation, if any, and whether crop marks will be added. Repeat until all pages
are added.
Target selection
Before you can start imposing you must select a target.
Click on the Change target button, and the Select Or Create Target window will appear. (The manual imposition window will reappear when you close this window.) You choose Use current sheet of the current document or Create a new document .
- When
you choose Use current sheet of the current document you are not
restricted to the document currently in front of you. You can select an
existing document by opening it or navigating to it. All of
the menus and tool buttons are available to you. For convenience, you can click
the Next Doc button to step through the open documents.
- When
you click Create a new document you choose its page size and shape
(tall or wide), or a background you have already defined. You also choose how
many pages the document has, but it is easy to add more later.
Once a target has been selected, two buttons are available to you.
- The
Next/new sheet button will move to the next page in the target. If you
are on the last page, this button will create a new blank page the same size as
the last page (or a copy of the next background page in sequence).
- The
Show target button at the bottom of the window makes the current target
sheet visible if you have been looking at other windows.
You can also click Change target at any time to change document, or to move backwards in the current document.
Source selection
You pick a source document by clicking the Pick source button. A new window appears. This is similar to the Change Target window, but has no option to create a new file. You can navigate with buttons, menus, and scroll bars to the required page, then click the Pick button. It is quite possible to open a new document (File menu) and then click Pick .
Once the document is picked, you have a View source button which is very similar to the View target button.
You can quickly change the current source page in the document by typing its number in the space provided. You can also use Pick source at any time to pick a different page or document.
The size of the current page is shown just below the page number. This page number will automatically increase by 1 after each page is imposed. At the end of the document you will have to select a new page or click Pick source to continue.
Performing Imposition
Once both source and target are selected you can impose a source page onto the target sheet.
The value you will always need to check is the position of the page. You can select a corner (top left, top right, bottom left, bottom right), and a horizontal and vertical value.
The value is measured from the corner of the sheet to the same corner of the page. For instance, if you choose bottom left, 1 inch horizontal and 1 inch vertical, then the bottom left of the page will be one inch across and up from the bottom left of the sheet.
The position of the imposition is shown on the sheet by highlighting it. Click View target if you can't see the target. You may also want to move the Manual imposition window so it obscures less.
When you are happy with the position click Add page .
You can also select that the page is to be rotated and scaled as it is imposed. The highlighted area will reflect this. After imposing the area will remain highlighted, showing the page just imposed. This is a reminder, too, that you will want to change either the position or the target page, otherwise the page will overlay the previous one.
If you select the Add crop marks option, marks are placed around the corner of each page. Allow about 1 inch/25 mm clearance around each page for the marks.
Shortcuts (4.0)
To speed up work, you
can use these shortcuts
- Shift + Pick
source picks the current document as a source.
- Shift + Change
target uses the last options selected in Change target.
- When you click a triangle to open or close a
group, you can hold down Shift to open or close all groups.
Double sided (4.0)
In many situations,
you will be using manual imposition for material to be printed on both sides.
In the past this has meant carefully setting the positions for the backs of
pages to be the mirror image of the front. For example, a page 1 inch from the
left may need a back that is 1 inch from the right. You now have a number of options to speed up this process.
You can choose Single sided, in which case everything
works as before, one side at a time. Or you can choose Double sided – horizontal mirror backs or Double sided – vertical mirror backs. These two choices allow you
to work either with horizontal mirroring (1 inch from the left becomes 1 inch
from the right), or vertical mirroring (1 inch from the top becomes 1 inch from
the bottom, and the back pages are upside down).

With these options
selected, the following apply:
- The target is automatically opened to a double
page view, so you can see the front and back side by side. The “front” is
always an odd numbered sheet, the “back” is always an even numbered sheet.
- The target is automatically adjusted to have at
least two sheets (front and back).
- The Next/new
sheet button will advance to the next front (odd-numbered) sheet, and makes sure that there is also a back
(even-numbered) sheet to follow. So it will usually
advance two sheets and add two sheets.
- The Add
page button is removed and is replaced by three buttons: Add front, Add back, and Add front and
back.

- Both front and back sheets will show a
highlighted area where pages could be added.
- If you click Add front the next page will be added in its position on the front
(odd numbered) sheet. The values for rotate, position, offset etc. are used
directly.
- If you click Add back the next page will be added in its position on the back
(even numbered) sheet. The values for location (top left, bottom right etc.),
for horizontal and vertical offset and for rotation are automatically adjusted
as needed.
- Both Add
front and Add back take the very
next page, without regard to if it is odd or even. So
you would normally always click Add
front before Add back.
- Add
front and back is exactly like clicking Add front then Add back.
So the effect is to add the next two pages in their
positions on the front and back sheet.
- Undo will remove the last page or pages added, so
after Add front and back, the Undo button would remove two pages.
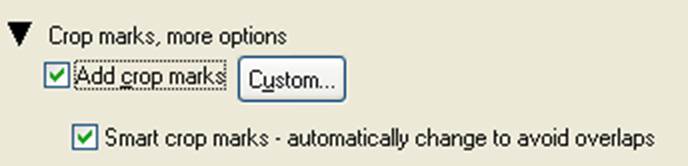
Smart crop marks (4.0)
When you select Add crop marks you can choose Smart crop marks. This then will make
sure crop marks do not overlap pages.
The effect is as
described in “Smart crop marks” in the manual, and
should give the same effect as when using the N-up or Step & Repeat
functions.
This means that crop
marks, once added, may be removed again or adjusted if they cause an overlap.
Because the crop marks are redone after each page, only one crop mark style can
apply to the whole sheet.
Crop mark adjustment
removes overlap, but adjustment may only be ideal if adjoining pages are the
same size.
Only crop marks from
the current manual imposition session will be affected; existing marks from
other impositions will be left in place.
Continue layout to more
sheets (4.0)
In the past, each
sheet had to be created separately, which may not be viable for a large number
of pages, and is not adjustable to different page
counts. You now have the option to create one sheet, or two sheets with front
and back, and repeat.
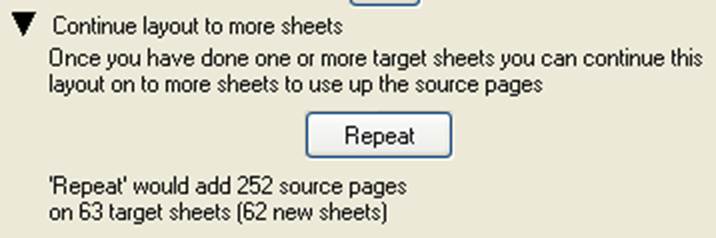
When you repeat, more
pages are taken from the source document, and more sheets are added to the
target document as needed. Pages are placed in the order, and position, that
they appeared in the sheets you first prepared. New sheets are only added if
they are not already present in the target document.
Once you have added a
page, the Repeat button becomes
available. Under it you will see an explanation of the effect it will have, and
how many new sheets would be created.
Just as when adding a
single page, the Undo function is
available, and will undo the whole repeat process, including removing any
sheets inserted.

Remembering manual imposition settings
In Quite Imposing 2.0 you can no longer use Remember Last Action with manual imposition. You can, however, use the much more powerful facilities of Automation sequences .
Some special limitations apply on using automation sequences with manual imposition. These limitations mainly apply because a manual imposition potentially combined many different PDF documents, while automation is limited to working with a single document. If these limitations are borne in mind, complex manual impositions can be reused on other files.
The main limitations are as follows:
1. When selecting a target you
must use Create a new document rather than Use the current sheet
of the currently open document
. Note that you may be able to define a background to get
the same effect.
2. After you have chosen a
source and applied a page, you cannot change the source again for the same
layout. If you combine all source pages into one document before starting, this
limitation can be overcome.
3. You cannot mix other
imposition commands within the manual imposition sequence.
These limitations only apply when trying to play back the sequence later.
You can, however, run other imposition commands before or after the manual imposition. You can select the result of a manual imposition as the source (not target) of a later manual imposition. The manual imposition will show up as a series of separate commands, with Next/new document resulting in an Insert blank pages command.
Notes on Manual Imposition
1. If you make a mistake in
placing a page, click the Info button at the top of the Imposition
window. You can then select the incorrect page and click delete. Then click
Manual to return to Manual Imposition - all your settings will be in place. Do
not do this, however, if preparing an automation sequence.
2. If you do overlay pages the
effects are not easy to predict. Some pages have a white background, so they
completely obscure the page beneath. Most do not, or
have patches of white. The effect is likely to be ugly. If necessary, use Stick
On Masking Tape before
imposition to conceal a page beneath.
3. Although you can impose pages
in any order, it is often easier to run Shuffle Pages For Imposing first
so the pages are presented in the right order.
4. For most imposing tasks, n-Up
Pages is designed to do the job.
Sometimes you may even have to run it more than once to impose into groups with
different margins, but it is still probably quicker than Manual Imposition.
5. You can use manual imposition
to combine PDF pages for any purpose. You can impose onto a sheet of any
document at any scale. The imposed pages become a part of the modified
document, which will be displayed and printed in all contexts, whether or not Quite Imposing is installed. Take care when
scaling down large images. They may look smaller, but they will occupy the same
amount of disk space.